Products
Tel: +86-531-58595086
Fax:+86-531-86113759
Mail: admin@superhousebj.com
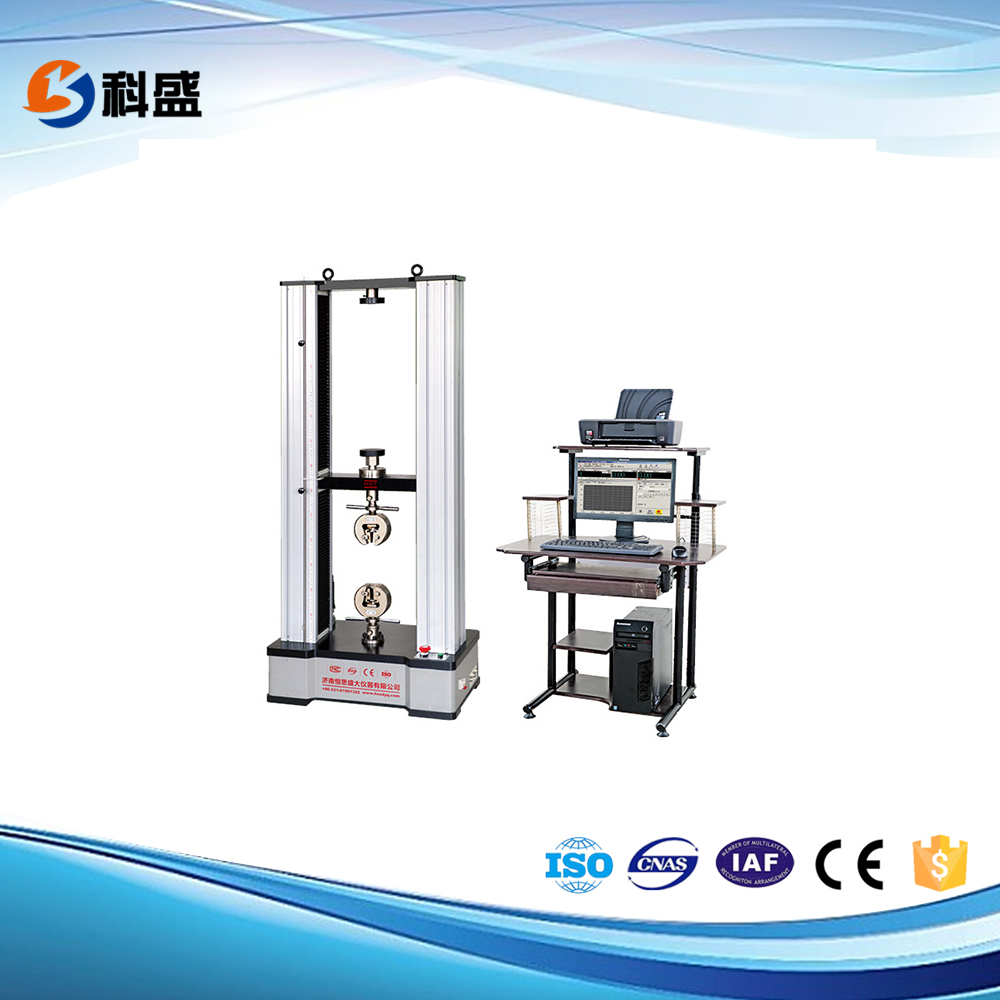
WDW-5 / WDW-5E Computerized Electronic Universal Testing Mac

WDW-5 / WDW-5E Computerized Electronic Universal Testing Machine
1.Application:
It is applicable for wide range of material for tension, compression, bending, shearing and low cycle test.
Suitable for metal, rubber, plastic, spring, textile, and components testing.
It is widely used in the corresponding industries, research and development, test institutes and training centers etc.
2.Standard:
ASTM, ISO, DIN, GB and other international standards.
3.Main Technical Parameters:
| Model | WDW-5 | WDW-5E |
| Max. Load | 5 KN | |
| Structure |
Four-column Floor Model (Upper Is Compression And Lower Is Tensile OR Upper Is Tensile And Lower Is Compression) |
|
| Control Method | Computer Automatic Control | |
| Load Accuracy | 1 Class | 0.5 Class |
| Load Range | 2%~100% FS(0.10KN~5KN) | 0.2%~100% FS (0.01KN~5KN) |
| Motor | TaiWan TECO AC Servo Motor | Panasonic Motor, Made In Japan |
| Sensor | High Precision Load Sensor,Made In China | Import Sensor, Made In USA |
| Resolution | 1/300000 | |
| Measuring Range Of Deformation | 2%~100% | |
| Accuracy Indication Of Deformation | ≤±1% | |
| Disp. Indicating Relative Error | ≤±1% | |
| Displacement Resolution | 0.04um | |
| Adjusting Range Of Control Rate Of Load | 0.005~5%FS/S | |
| Control Precision Of Control Rate Of Load |
When rate < 0.05% FS/s, the precision is within ± 2% of setting value; When rate ≥ 0.005%FS/s, the precision is within ± 1% of setting value. |
|
| Adjustment Scope Of Deformation Rate | 0.005~5%FN/S | |
| Accuracy Of Deformation Rate |
Test Speed<0.05%FN/s, within the ±2% of the preset value, Test Speed≥0.05%FN/s, within the ±0.5% of the preset value. |
|
| Adjusting Range Of Displacement Rate | 0.05~1000mm/min (Can be customized) | |
| Control Precision Of Displacement Rate |
When rate < 0.5mm/min, within ± 1% of setting value; When rate ≥ 0.5mm/min, within ± 0.5% of setting value. |
|
| Scope Of The Consistent Load Deformation And Displacement Control | 0.5%~100%FS | |
| Accuracy Of The Consistent Load Deformation And Displacement Control |
Preset value≥10%FN, within the ±0.1% of preset value; Preset value<10%FN, within the ±1% of preset value. |
|
| Tensile Space | 800mm (Can be customized) | |
| Compression Space | 800mm (Can be customized) | |
| Effective Spacing | 400mm (Can be customized) | |
| Load Cell Configuration |
One PC (Max Load). More load cells can be added according to customer requirement. |
|
| Extend Configuration |
Large deformation extensometer, High or low temperature test chamber, High temperature oven. |
|
| Power Supply | AC 220V±10%, 50Hz (Can be customized) | |
| Grips | Wedge Type, Plate Type And Other Grips As Customers’ Demand | |
| Dimension | 740*420*1720mm | |
| Weight | 160 KG | |
4. Main Unit Feature:
4.1 Adopt floor structure,High Stiffness, lower for tensile, upper for compression、upper for tensile, lower for compression, double space.
The beam is step less lifting.
4.2 Adopting ball screw drive, realize no clearance transmission,make sure the precision control of the test force and deformation speed.
4.3 The shiel plate with limit mechanism used to control the beam moving range, in order to avoid sensor damaged due to the moving
distance is too large.
4.4 The table, moving beams is made of high quality precision machining steel plate , not only reduce the vibration generated by specimen
fracture, but also improve the stiffness.
4.5 Three columns of mandatory orientation, make the main unit rigidity much improved, to further ensure the repeatability of measurement.
4.6 Adopt bolt type grip installation, make the grip replace easier.
4.7 Adopt AC servo driver and AC servo motor, with stable performance,more reliable. Have over-current, over-voltage, over speed,
overload protection device.


